
Wrapped With Love: Yarn Adorned Initials
Combine the fun of quarantine crafts and the joy that comes with gift-giving, and you have homemade Christmas ornaments! After a trip to my local Michael’s, I dismantled an empty Amazon box, set my Bose speaker to the Christmas Hits playlist on Spotify, lit my winter evergreen-scented candle, and began sipping a freshly brewed cup of New England Coffee’s Peppermint Bark roast to set my crafting vibe — could this get any more festive?
Sharing a list of supplies below if you’d like to make some of your own thoughtful and personalized, low-budget holiday mementos.
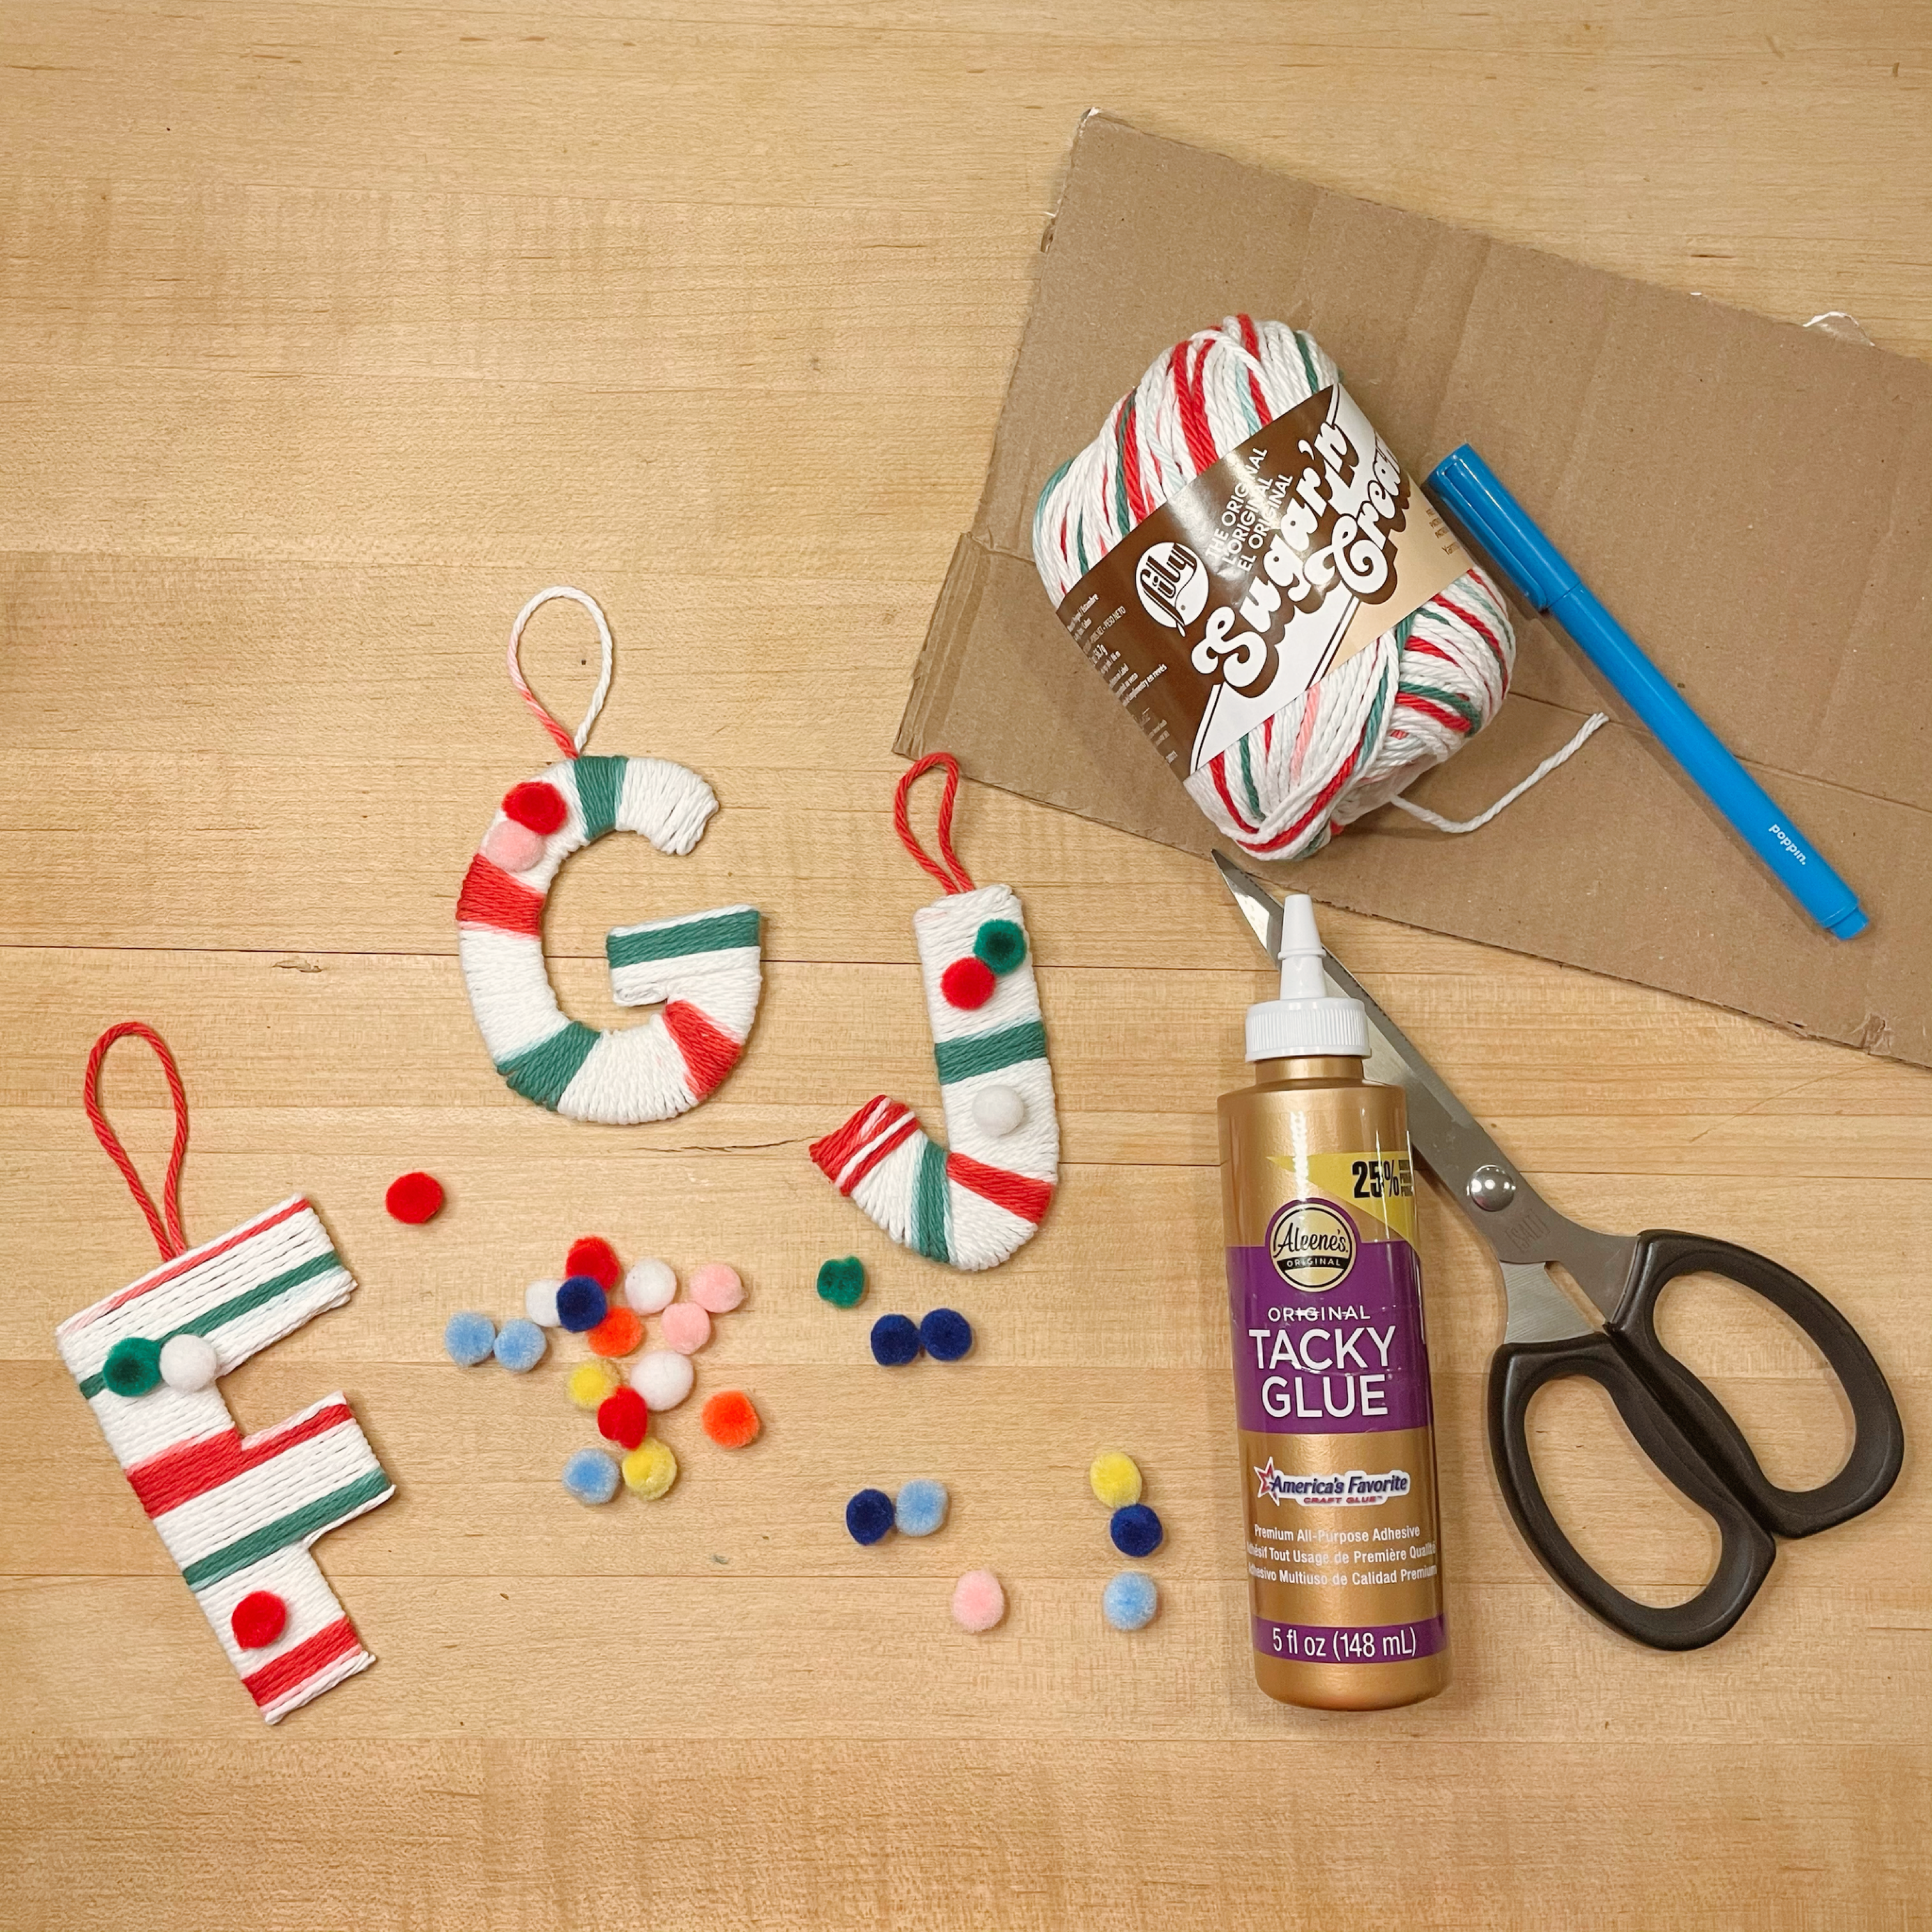

Supplies


Before we get started, I wanted to share a preview of the final product and the many letters you can make!


Start by flattening your cardboard box, sketching your first letter, and carefully cutting it out. Marker ink may stain your yarn as you’re wrapping, so I recommend using a pencil or pen. Since we’ll be completely covering the cardboard, it doesn’t matter which side of the cardboard you sketch the letter on — sketch away!
I made many letters, so I learned some lessons the hard way through a couple of fails (the letter ‘m’ is surprisingly very hard!). My best advice is to make sans serif letters and make them as round as possible. I ended up opting for a lowercase ‘m’ because the points of the uppercase were very difficult to wrap. I think my ‘G’ and ‘J’ were a success thanks to the fact that they had curves!


Create a finger-length loop with your yarn to serve as a string to hang the ornament. Place a small amount of glue on the back of the ornament in the middle and at the top. Press the yarn into the glue and snip to release the yarn from the bundle. Now, placing the beginning of the string at the back of the letter to conceal the start, begin wrapping tightly enough where the yarn is nice and taught, but the cardboard is not crushed. Your yarn should still be attached to the larger bundle throughout for the most consistent look, so avoid cutting off a long string to start if possible. You’ll need to take on each letter with a different strategy and get creative when navigating nooks and crannies — these areas can be tricky!


When you get to the end of wrapping, place a dot of glue on the back of the letter, glue the last bit of yarn down, and snip. To complete the look with care and detail, we need to conceal the cardboard on any ends that may not have been covered. Place a thin line of glue on the end that needs coverage and create a loop with the yarn that is the length of the letter’s end. Attempt to tuck in the ends of the yarn after you snip the loop from the bundle, and squeeze together while also pressing down to attach to the initial.


Congrats — you completed your first ornament, and you’re ready to create more! I had so much fun crafting these ornaments for family members, and I hope you do too. Before giving them away, I snapped a few photos of them on my mini Christmas tree to model the final product. If you end up making some of your own, I’d love to see photos — tag me or send me a DM!
I am kind of feeling an Anthropologie vibe from these. What do you think?


No Comments